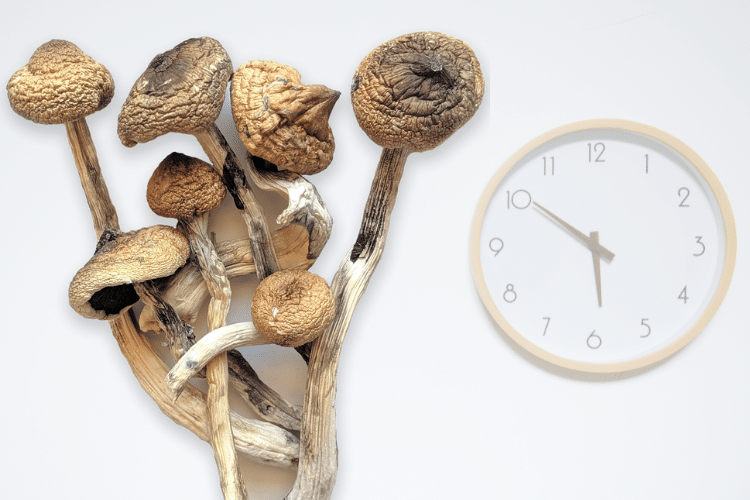
How Long Does It Take To Grow Magic Mushrooms
“How long does it take to grow magic mushrooms”? is a very common question that newbies have when embarking on their new passion project. While growing your magic mushrooms is a rewarding hobby and purchasing them from a dispensary is becoming common in some areas, this is not available to everyone in the world just yet.
The good news is that growing mushrooms is easier than you might think. Depending on your goals, it doesn’t have to be expensive. You can order mushroom grow kits to get a taste, or, if you want the full experience, keep reading this guide to learn how to build a basic at-home setup.
Most supplies are easily found in grocery stores and garden centres. The trickiest part – mushroom spores – are even legal to buy in most places, as they contain no psilocybin.
Table of Contents
The Life Cycle Of Mushrooms
Mushrooms aren’t plants, they are fungi, and they act a bit differently. For example, fungi don’t use photosynthesis and not all fungi breathe carbon dioxide. Instead, some breathe oxygen like humans – remember that one for later.
The world of fungi is a deep rabbit hole of fun facts, but today we’ll stick to the basics, how mushrooms reproduce, so you can figure out what to expect when growing a crop.
Mushroom Spores
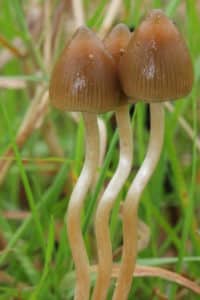
Mushrooms start out as spores, which are very reminiscent of plant seeds. Mushrooms produce fruits (the part you eat, again, like plants) and, at the end of their life cycle, begin looking to reproduce, and release their spores.
One mushroom can produce millions of spores. They come in many different colours and can look like dust coming out of your mushrooms. Spores of the most common psychoactive psilocybe cubensis variety are typically dark brownish purple to almost black.
Hyphae and Mycelium
When spores released by mushrooms find each other, they join together to form hyphae. As various hyphae become interconnected, they form a network called mycelium.
Mycelium can be thought of as mushroom roots but is also the immune and digestive system producing enzymes to break down the food or battle invaders.
Mushroom Fruits
Once formed and implanted, mycelium spread, gathering nutrients and growing stronger. When the time is right, changes of temperature and moisture will trigger fruiting, although other factors like a challenging environment with little food or too much competition can trigger premature fruiting. Ideally, when growing mushrooms, you will control environmental conditions at the right moment to trigger mushrooms a “flush”. When the mushrooms mature they will open their “veil” where the mushroom cap attaches to the stem. When the veil breaks, the “gills” of the mushroom will be revealed, which release spores and repeat the mushroom growth cycle. If you want to learn more about mushrooms parts, read our article “Psilocybin Mushroom Anatomy 101“
How To Grow Mushroom Spores From Syringe with PF Tek
Now you’re ready to start growing! The first step is growing mushroom spores is to obtain the spores of your desired species from a trusted mushroom spore supplier. Then you need to decide upon your growing method; PF Tek is generally the best “technique” for beginners and is what we provide here. Our technique here differs slightly from the original, but we think it is a bit more accessible.
PF Tek was created by Robert McPherson and stands for his online handle Psylocyba Fanaticus. Popularized by online mycology communities like Shroomery, PK Tek can be done with supplies commonly found at hardware stores.
The yields will not be as high as in other methods, but it is a great place to get your feet wet and have some success.
Supplies for Growing Magic Mushrooms with PF Tek
Be sure to have your supplies ready before you start. Some parts of the process can’t be interrupted by going back to the hardware store and not keeping your environment clean.
Hygiene
ISO propyl alcohol – for sterilizing your surfaces and tools
Rubber Gloves – not necessary but every bit of cleanliness counts
Face Mask – an easy precaution but not vital
Growing Equipment
Mason Jars with Lids – to hold substrate, be they are the type with a wide opening
Tinfoil – enough to cover all the mason jar lids
Large Clear Plastic Tote – big enough for all mason jars with a couple of inches between
Tools
Drill and Bits- to make holes in jar lids and fruiting chamber
Measuring Cup – for measuring dry substrate materials
Large Bowl or Bucket – for mixing substrate
Torch or Lighter – to sterilize spore syringe
Large Pot – big enough to hold all of those mason jars
Growing Materials
Mushroom Spores – mushroom “seeds” bought online
Brown Rice Flour – found at the local grocery store
Vermiculite – a mineral bought at garden supply stores
Distilled Water – bottled and from contamination and chlorine
Perlite – a treated mineral found at garden centers
Timeline and Instructions for Growing Magic Mushrooms
And finally, the answer to the question you asked to begin with, “How Long Does It Take To Grow Magic Mushrooms”? The time it takes to grow psilocybin mushrooms with the PF Tek is around 4 – 6 weeks, assuming you use healthy psilocybe cubensis mushroom spores in an optimal environment. As mentioned, different species and environments can affect this, but the breakdown is roughly:
Prepare, Sterilize and Innoculate Substrate: a few hours
Colonization: 2 – 4 weeks
Fruiting: 10 days – 2 weeks
Preparation and Cleaning
The most crucial aspect to focus on when cultivating mushrooms is to be as clean as possible every step of the way.
In these steps, you will be creating the perfect conditions for fungi to grow. However, fungi you don’t want growing can also grow in the environment you create and bring clean how you protect your crop from contamination.
Working in an area free of contamination means cleaning every surface and tool while being aware of airflow that may contain airborne contaminants. Being diligent with showering, wearing clean clothes, and sterilizing your tools will also significantly increase your chances of a successful grow.
Preparing the Substrate
First, you need to prepare your jar lids. Using your drill (or if you don’t have a drill, a hammer and nail) make 3 or 4 holes in the lids of your jars. Select a drill bit that will fit in the holes because later you will use them to inject spores into the sealed jars.
Then you need to prepare the substrate, which is the food and growing environment for your mushrooms. Brown rice flour is the most common bed, although cubensis mushrooms feed on a large variety of materials.
Mushrooms also need air to grow. Vermiculite creates air pockets for the mycelium to expand into, along with space for it to grow.
Finally, water is added (as fungi consume water).
To actually mix the substrate, determine how many jars you are going to fill. For each jar, measure out roughly:
½ cup of vermiculite
¼ cup of brown rice flour
¼ cup of distilled water
Activating and Sterilizing the Substrate
When you mix these ingredients, ensure that you get the substrate’s proper saturation level or “field capacity.” Too much water will drown your mushrooms, and once you sterilize and seal your jars, you cannot change the amount of water inside.
Pay attention to water pooling in your mixing bowl. If there is a small puddle, you have added too much, pour off any excess amount. This step is important, and if you aren’t happy with your mix, don’t be afraid to start a new batch.
An ideal consistency is described as fine damp sand without clumps. Fill your mason jars with the substrate while leaving an inch from the top of the jars for air. Then, add the jar lids and cover the holes with tinfoil.
To finish preparing your substrate, you will heat the jars to kill any bacteria or fungi that might contaminate your grow.
For the sterilization, fill your large pot with a few inches of water, enough to create steam for an hour and a half. Place the jars inside. They should not be fully submerged in water.
It can be helpful to add something like mason jar rings to the bottom of the pot to protect the jars from breaking. Keep an eye on the water level throughout the steaming process and top up when necessary.
Innoculate Substrate
Once your jars are cooled you are ready to inject them with mushroom spores. For this step, your cleaning is essential. You have killed any organisms in the jars so whatever you introduce will grow without competition – make sure it’s only your mushrooms!
Cleaning yourself and your workspace is the first step. Then, when you are ready to innoculate your jars remove the tinfoil from the lid and sterilize your syringe.
To sterilize the syringe, simply hold the lighter or touch flame to the tip of the needle until it is red hot.
Once this is complete, inject 1 or 2 ml of liquid spore culture into the holes you made on the top of your jars. Replace the tinfoil cap and set these aside to “colonize.”
Colonization
After inoculating your jars, they need to be colonized by the mycelium. This means the mycelium will spread through your jars, eating the substrate until it is strong enough to produce a nice flush of mushrooms.
Colonization takes 2 – 4 weeks depending on the growing conditions, type of mushroom, and how solid your cleaning and sterilization practices are executed. Ideally, the temperature is between 75° and 80° F.
It will be tempting to keep checking on your mushrooms for signs of growth during this period. It is fun to watch their progress, but try to let them grow in peace as much as possible.
Eventually, you will begin to see signs of life in your jars. This will be the white network of mycelium spreading throughout the substrate. You are looking for mycelium completely filling the jar, consuming as much of the substrate as possible in preparation for fruiting.
Once it looks like the jar is full of mycelium, it’s best practice to give the jars another week to be colonized entirely, even the areas inside that you can’t see.
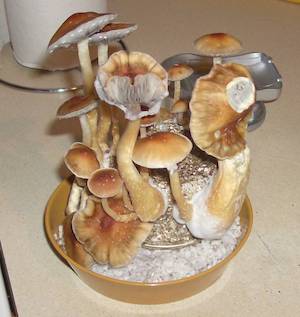
Fruiting
When the jars are fully colonized, the substrate inside becomes a solid mass, called a “cake,” which is then ready to be “birthed.” To birth your cakes, you can remove the jar lid and shake out the cake. Some tapping or prying with a butter knife may be necessary.
Because your cakes are mostly colonized by mycelium, they are far more resistant to contamination at this point. However, its a good idea to work in clean environments, and personal hygiene is always a good idea.
Once free of the jars, the cakes are ready to produce mushroom fruits! To do this, you will need a fruiting chamber. This is typically called a “shotgun fruiting chamber” and is a large, ideally clear, plastic box with many holes in it.
Use a drill to make holes every few inches around the sides and lid of the container. This will allow for airflow.
To fruit, mushrooms will also need humidity. To maintain high humidity, you will use your spray bottle to mist the sides of the chamber and add wet perlite to the bottom of the container.
Perlite is porous, meaning it has many tiny holes in it. These cavities absorb and hold water which helps maintain the high humidity mushrooms love. Add 3 or 4 inches of perlite to the bottom of the fruiting chamber and soak it overnight. Be careful to pour off any pooling water to avoid contamination problems.
With the conditions just right – ideally, 100% humidity (you can measure humidity with a higrow meter) and between 60° and 70° you should see pins forming on the cakes. Fully colonized cakes should start showing pins in 10 days to two weeks.
Pins will typically turn into full-blown mushrooms in 3 to 5 days. The moment to harvest is just before the cap is about to separate from the stem and open to release spores. When you harvest, be sure to get every little mushroom. Removing them all signals the mycelium to produce another “flush” of mushrooms.
Drying Magic Mushrooms
Once the mushrooms are harvested, you can eat them fresh or dry them for long-term storage. The best way to dry mushrooms is in a food dehydrator until they are “cracker dry” or the stems snap when bent.
If you don’t have a dehydrator, you can put the mushrooms on a paper towel in a cool, dry place. Some people like to set up a fan in front of the mushrooms to increase airflow. Air drying can work well, but be aware this method does typically remove 100% of moisture from the mushrooms.
Another effective method is using a desiccant. These are compounds that absorb water, like silica packs in vitamin bottles or cat litter. Putting mushrooms into a container with desiccants can get mushrooms nice a crispy for long-term storage.
If you want to get to know the ins and outs of drying and storing magic mushrooms check out How to Properly Store Mushrooms.
Welcome to the World of Mycology
Knowing how long does it take to grow magic mushrooms is just a starting point for your growing journey; there are many different species (check out Frshminds’ psilocybin mushroom species guide to learn more), techniques, and tricks to learn to grow all types of mushrooms. PF Tek isn’t the most efficient way to produce pounds of psychedelic mushrooms, but it is an important stepping stone to understanding how mushrooms work and why. And can provide some fun trips for you and your friends along the way!
Still Curious About Growing Magic Mushrooms?
Check out these articles on Frshminds.
- Are Magic Mushroom Grow Kits Worth It?
- Where Do Liberty Caps Grow and How to Get Them
- Growing Magic Mushrooms: Resources
- Growing Psychedelic Truffles
- How to Grow Penis Envy Mushrooms
- Wondering How To Grow Psilocybin Mushrooms?
- What Are Psychedelics? Are They Growing In My Garden?
- Psilocybe Semilanceata Cultivation
Comments